During biometric capture, it is essential to obtain high-quality images to ensure the accuracy of facial/fingerprint recognition and reduce errors, such as false positives or negatives, avoiding rework. It is also important to meet international interoperability standards, ensuring system reliability and efficiency.
To simplify the integration of biometric solutions across various devices and platforms, BioPass ID provides SDKs with technical support, detailed documentation, and practical examples. These resources enable developers to incorporate biometric capture functionalities with ease, high performance, and security.
Ideal for applications like user authentication, access control, and payment systems, the BioPass ID’s Capture SDK streamlines the integration of biometric recognition technologies, such as facial and fingerprint recognition, into different devices and systems. The tool assists in capturing, validating, and processing high-quality images, offering benefits such as easy integration with existing systems, high precision in biometric capture, compliance with international security standards, and versatility for various applications. Additionally, the SDK reduces costs, optimizes processes, and provides users with a faster and more secure experience.
In this tutorial, we’ll walk you through the step-by-step process of capturing biometric images using BioPass ID’s SDKs. We’ll also cover best practices, configurations, and available features.
Shall we?
Prerequisites to use BioPass ID SDKs
BioPass ID SDKs are designed to offer maximum flexibility and performance across different platforms and devices. However, to ensure effective integration and usage, certain technical prerequisites must be met, along with adherence to recommended best practices. Here are the details:
First, to use the SDK, the operating system must be compatible with web, desktop, and mobile devices (Android or iOS).
The platforms and devices should have:
An updated operating system (Windows, macOS, Android 9+, or iOS 13+).
- Hardware compatible with high-resolution biometric sensors.
- Sufficient storage space and memory to process image captures and validations.
- Another requirement is the correct configuration of the environment to ensure that the application utilizes the SDK's available functions optimally.
Another requirement is the correct configuration of the environment to ensure that the application utilizes the SDK's available functions optimally.
Step-by-step for image capture with the SDK
The documentation provides tutorials for integrating the face, fingerprint, and signature SDKs. Here, we’ll focus on the facial recognition SDK using React Native, which supports both Android and iOS. It's important to remember that the other SDKs are just as simple.
Step 1: prepare the environment
Before getting started, ensure your development environment is properly set up with the chosen technology:
Use React Native (minimum version 0.65).
- Install Node.js and npm/yarn.
- Configure the development tools for Android and/or iOS.
Step 2: Install the SDK
In the terminal, navigate to your React Native project directory and run the following commands:
- npm install @biopassid/face-sdk-react-native
- In case you are using Yarn:
yarn add @biopassid/face-sdk-react-native
After installation, configure the dependencies:
- Android: check the android/build.gradle file and add the necessary dependencies.
- iOS: ensure CocoaPods is installed and run “npx pod-install”
Step 3: integrate the SDK into the code
Now, import the SDK into your project and initialize it in the main component of your application:
import FaceSDK from '@biopassid/face-sdk-react-native';
// Initialize the SDK
FaceSDK.initialize('<YOUR_LICENSE_KEY>');
Make sure to replace <YOUR_LICENSE_KEY> with the license key provided by BioPass ID.
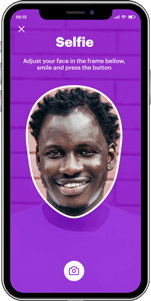
Step 4: capture the image
Next, perform a capture with the application, adding a button or other component to call the capture method according to the code:
FaceSDK.captureImage() .then((result) => { console.log('Image captured:', result);
}) .catch((error) => {console.error('Capture error:', error); });
This code makes capturing simple and efficient. You can also customize the user interface to maintain the application's visual standard.
Step 5: customize the interface
Here’s an example of how to customize the interface using React Native:
To achieve this level of detail, you can add a style variable like the one below, modifying the necessary items to fit your design:
const styles = StyleSheet.create({
container: {
flex: 1,
paddingHorizontal: 30,
backgroundColor: '#FFF',
},
});
You’ll find the complete list of customizable options in the Face SDK React Native documentation.
Tips for getting the best shot with the SDK
To achieve the best captures using the @biopassid/face-sdk-react-native, follow these tips and best practices based on the features of the BioPass ID SDK:
- Configure quality parameters
Ensure you use the recommended quality settings so that images meet biometric standards. The SDK allows you to adjust configurations to ensure more accurate captures.
- Provide user feedback
Use on-screen messages to guide users in positioning themselves correctly. For example, display instructions for centering their face or moving the camera further away. The SDK offers real-time feedback to improve user experience.
- Avoid common errors
Guide the user to avoid places with too little or too much light directly on the face. The size of the captured image can facilitate integration with other BioPass ID functionalities, such as the Liveness Detection API. It is also important to make sure that the image size meets the system's standards. A well-lit environment is essential for a good capture.
BioPass ID capture SDK and APIs
The Capture SDK enhances image quality for later use in systems and can be combined with BioPass ID’s multibiometric and quality APIs. Let’s look at an example:
Simulate a matching process using fingerprint biometrics. Here’s how to make calls to the API for biometric extraction and matching:
1. After acquiring the API key, add it to the code as follows:
const licenseKey = "your-license-key";
const headers = {
"Content-Type": "application/json",
"Ocp-Apim-Subscription-Key": "your-api-key",
};
2. Once this is done, include the biometric extraction and matching calls.
async function extractTemplate(image: string): Promise<string | null> {
const body = JSON.stringify({
Extract: {
Type: "FINGER",
Format: "ISO_IEC_2005_19794_2",
Artifact: image,
},
});
const response = await fetch(
"https://api.biopassid.com/multibiometrics/extract",
{
method: "POST",
headers,
body,
},
);
const status = response.status;
const data = await response.json();
If you need it, the API documentation for the fields can be accessed directly here.
3. Include the match function, receiving the biometric extractions.
const response = await fetch(
"https://api2.biopassid.com/multibiometrics/match",
{
method: "POST",
headers,
body,
},
);
const data = await response.json();
console.log("Response status:", response.status);
console.log("Response body:", data);
}
Now, just add the captured fingers and the biometric match application will be ready.
Ensure the best capture for the user
In this article, you’ve learned the prerequisites for using the BioPass ID Capture SDK and followed the step-by-step guide for integrating it into systems. With support for multiple platforms, the SDK provides a robust foundation for creating efficient and secure recognition systems.
The Capture SDK also allows applications to maintain the company’s visual identity. From preparing the environment to configuring quality parameters and customizing the interface, every detail ensures that your biometric solution is reliable and effective.
Want to learn more about BioPass ID SDKs? Contact one of our experts and get the license to integrate the SDK functionalities today.
