Facial biometrics detection is a very useful and widely used technique in computer vision. It allows systems to identify and track faces in images or videos, which can be useful in a large range of applications, such as face recognition, emotion detection, security, and others.
Face detection in images or videos has many practical applications: use in face recognition systems for authentication and security in mobile devices, in surveillance systems to detect suspicious activity in public places, and in entertainment applications to create face-based filters and effects
The process of face anonymization, on the other hand, refers to hiding or blurring a person's facial identity. It can be applied to protect the individual's privacy, ensure safety in risky situations, and comply with data privacy laws. Examples include images and videos captured by surveillance cameras in public spaces, where people's privacy also needs to be protected.
Learn to detect biometrics with Postman
Now that we know some of the important applications for these technologies, let's learn how to detect and anonymize faces in an image, using BioPass ID's multibiometric API package features and Postman as a test platform.
Ready to put it into practice? Check out the steps below.
1. Get the biometric API access key
To make requests to the biometric API, you must obtain the access key that identifies and allows the use of the different functionalities of the system.
2. Detect faces
In this tutorial we will use a single image with 3 faces, taken from the internet, which will be used for both detection and anonymization. In BioPass ID's multibiometric API package, the face detection operation shows us the number of faces found in an image and the rectangles that indicate the positions of each of them. This is what we will see now.
2.1 Set up the authorization header
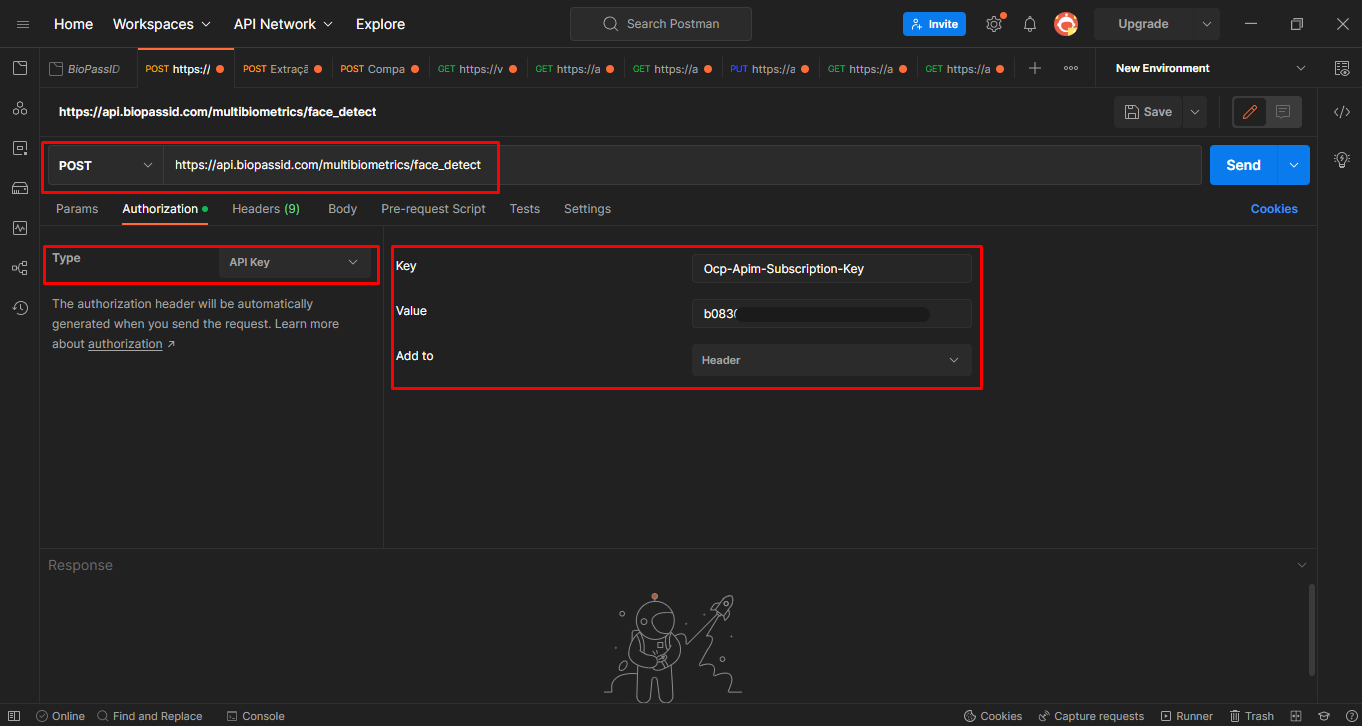
Once you have acquired the API access key, set up the authorization header. As shown in the Biometric API documentation, the URL used for this call is https://api.biopassid.com/multibiometrics/face_detect and the method is "POST".
Then select the type for "API Key", fill in the "Key" and "Value" fields respectively with Ocp-Apim-Subscription-Key and the value of the "API key", which is the access key mentioned earlier. Select the "Header" option in the "Add to" field. All the fields mentioned are marked in red, as shown in the image below:
2.2 Define the body of the request
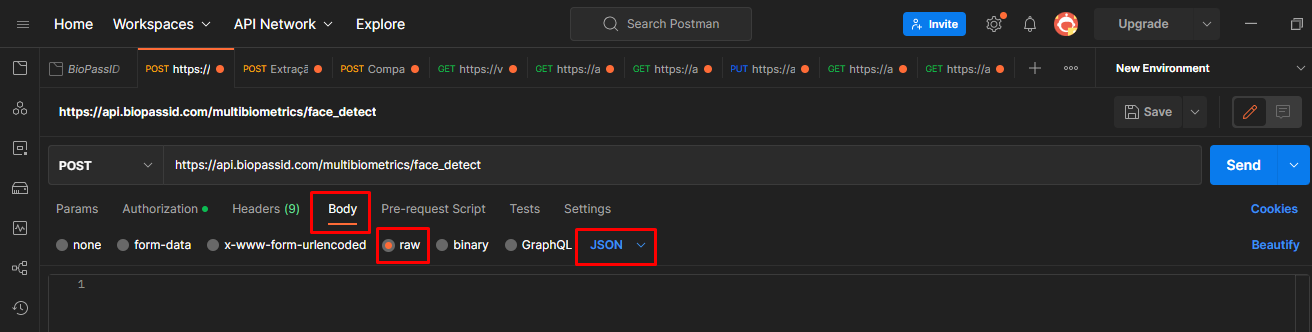
Now fill in the parameters for the body of the request. Select the "Body" section, the point "raw" and in the drop-down list, the JSON format, an abbreviation for "JavaScript Object Notation", a lightweight, easy-to-read and easy-to-write data interchange format often used to transmit data between a server and a web client.
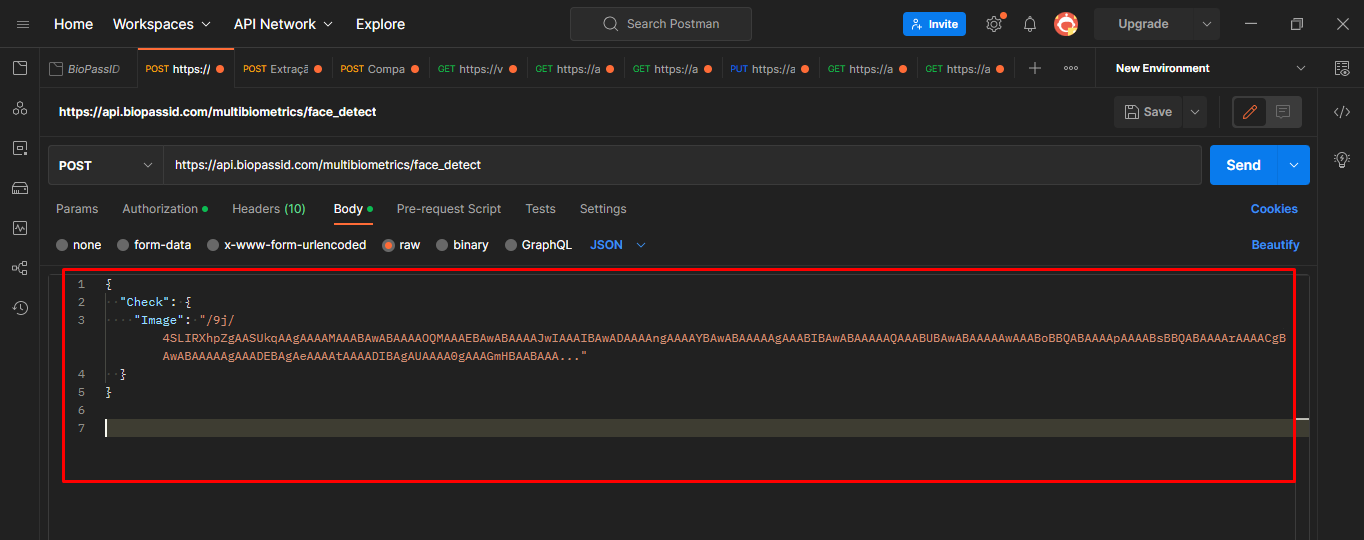
The structure of the request body has the "Check" object, which represents the analysis of the submitted image, and within it, has the "Image" field. Include the converted image in the base64 string. If you want to understand a bit more about base64, as well as learn how to do the encoding, you can follow step 5 of the article How to register an individual's facial biometrics with Postman.
In Postman, the structure looks like this:
We have placed the partially filled code below. You just need to replace the content of the "Image" field:
{
"Check": {
"Image": "{{base64}}"
}
}
2.3 Analyze the request response
In case of success, you will see the status "200 OK" and the body of the response with an object of the "DetectedFaces" type with the fields: "FaceNumber" which returns the number of faces found in the image and "FaceRects" an array of objects, where each object corresponds to a rectangle that indicates the position of a face detected in the submitted image. Each object has the x and y coordinates, as well as the height and width of the rectangle.
See the image below for the structure of a successful response:

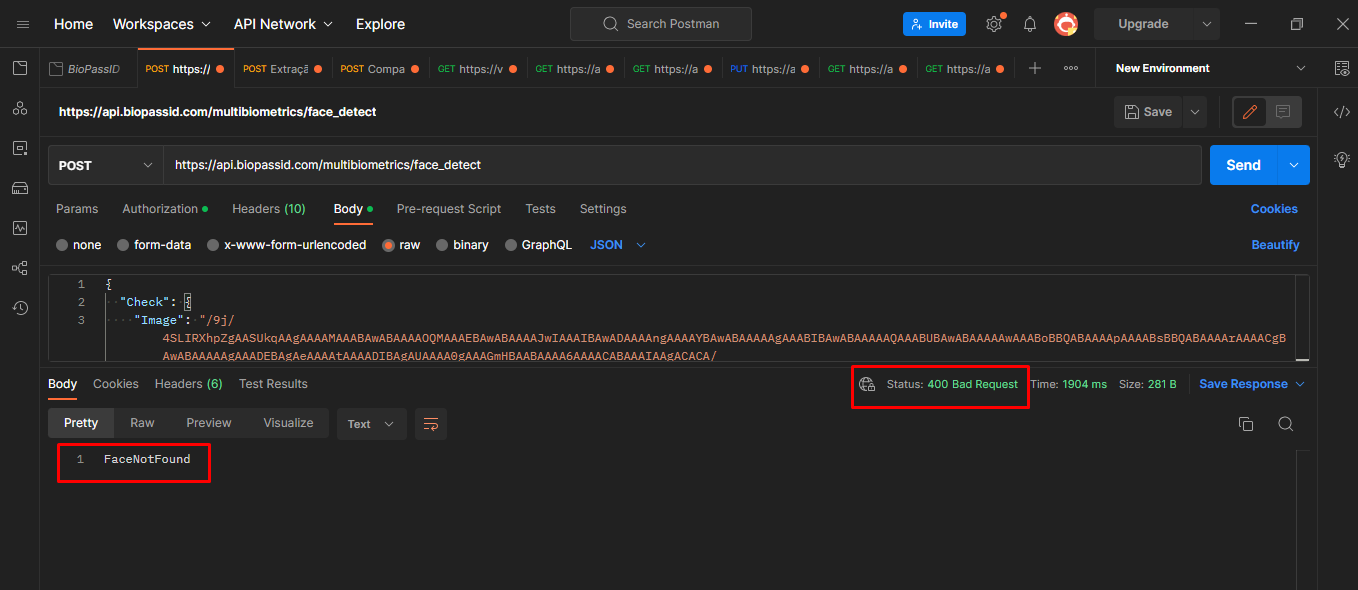
On unsuccessful operation, the response status is a numerical code that starts with the numbers 4 or 5, accompanied by the reason for the error. An example is "FaceNotFound", which occurs when no face is found in the image. This type of failure can also occur when the image submitted is of low resolution and has many faces. Take a look at a request template with the mentioned failure:
Remember, you can see the error codes and their descriptions in the Biometric API documentation.
3. Anonymize faces in photos
Now that you've learned about and tested a face detection operation, an important feature of the BioPass ID multibiometric API package for many types of applications, you can move on to the function that anonymizes a face.
Use the same image as the previous operation, which has 3 faces When the request is complete, an image will be returned in PNG format with a blur rate of 0.8, i.e., the faces identified in the image will have their transparency reduced by 80%.
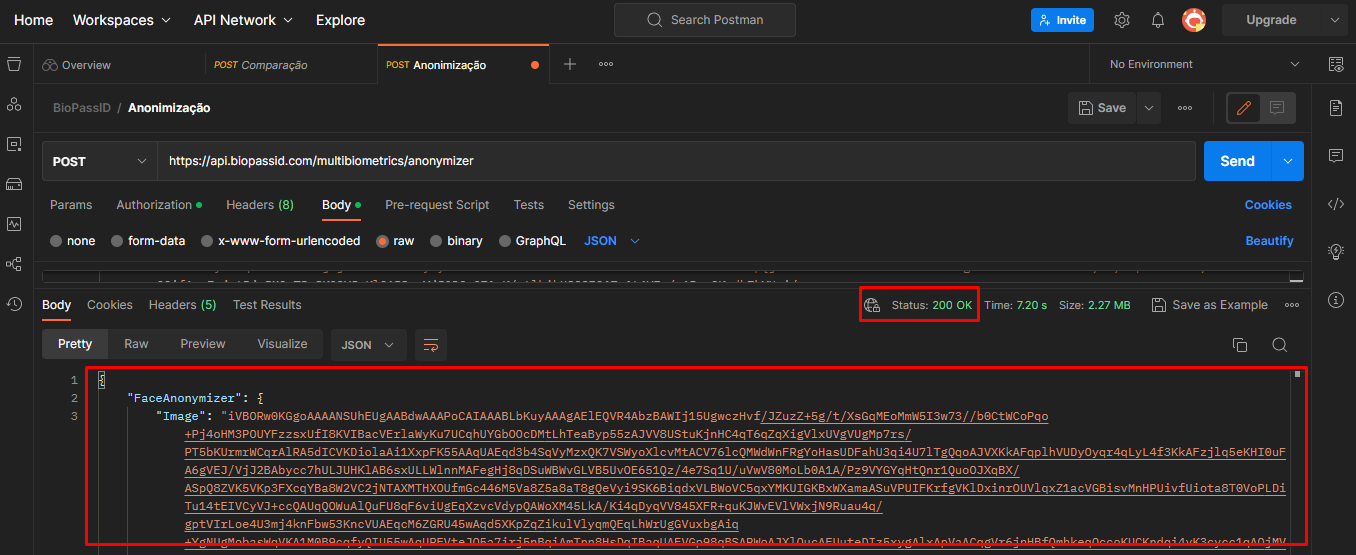
The format of the header and body of the request is almost identical to the face detection operation, the only difference is in the last part of the URL https://api.biopassid.com/multibiometrics/anonymizer

The successful response will return with the status "200 OK" and the body with an object of type "FaceAnonymizer" and an "Image" field with the image in base64 string. See below:
3.1 Decode the base64 string
To see the image with the anonymized faces, now decode the base64 string contained in the "Image" field of the request response.
It is simple and fast, just copy the content belonging to the "Image" field and access the same online converter that was used to encode the image submitted in the operation, follow the direct link: https://base64.guru/converter/decode/image.
On the page, paste the content into the reserved space, click on the 'Decode Base64 to Image' button, and the image will be generated instantly. See below:

Process Conclusion
As you have seen in this article, the process of testing the face detection and anonymization functionalities is relatively simple and can be performed by professionals from different fields using tools and software available on the internet.
By testing the BioPass ID Biometrics API, it is possible to evaluate its efficiency in different conditions, such as low light environments or with variations in the position of faces. In addition, testing also allows you to identify possible flaws or limitations of the API, which can be corrected or bypassed before its implementation in systems and applications.
Also understand how to compare facial biometrics using Postman, in another tutorial on our Blog.
